
Installing Universal Policy Administrator
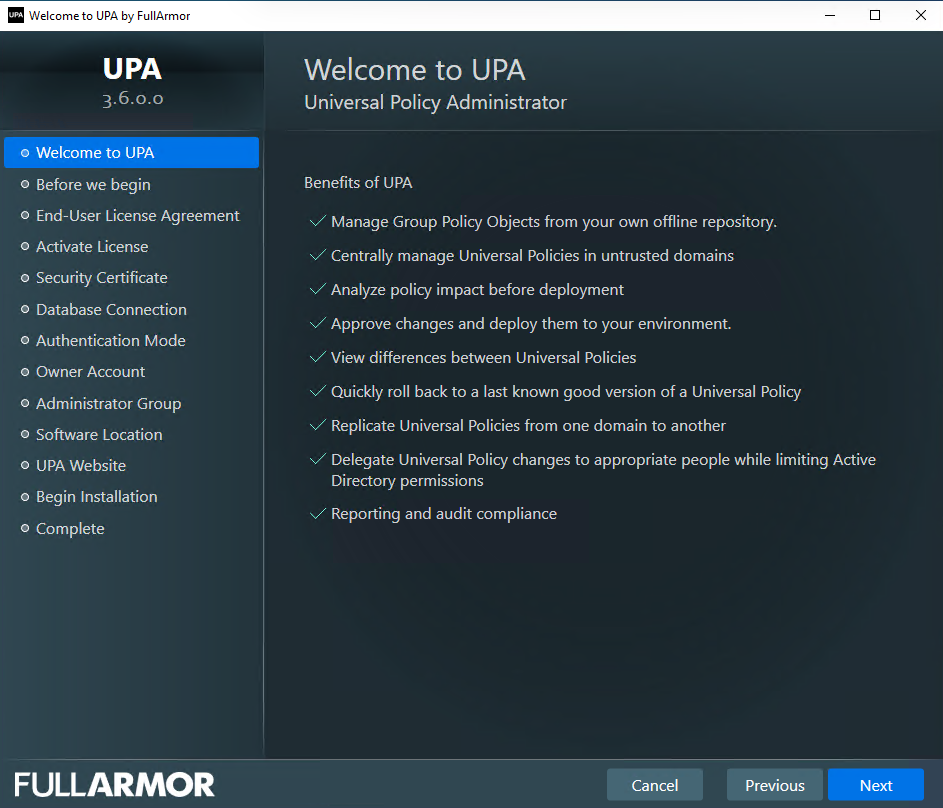
Below is a high-level workflow of the steps to install UPA and get it configured for your users.

Prerequisites
- Windows Server 2016+
- Local Administrator rights for installation
- An account with Domain Administrator access or AD permissions per Least Privilege Accounts (LPA).
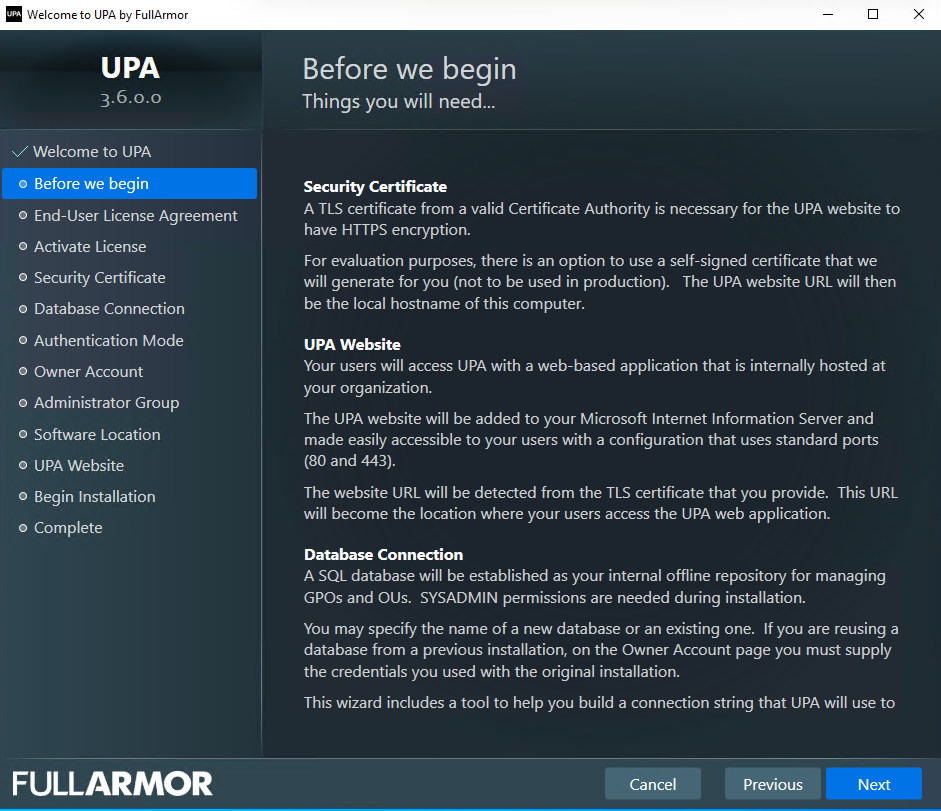
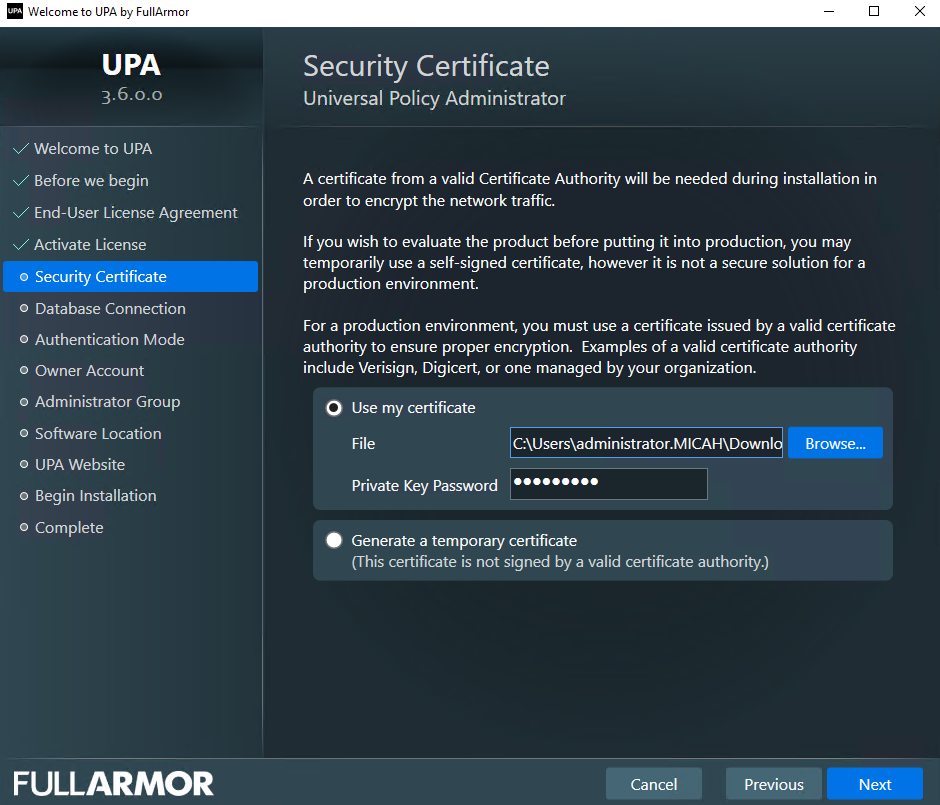
- Security Certificate. A TLS certificate from a valid Certificate Authority is necessary for the UPA website to have HTTPS encryption.
For evaluation purposes, there is an option to use a self-signed certificate that we will generate for you (not to be used in production). The UPA website URL will then be the local hostname of your computer. - Microsoft IIS for UPA Website. Your users will access UPA with a web-based application that is internally hosted at your organization. The UPA website will be added to your Microsoft Internet Information Server and made easily accessible to your users with a configuration that uses standard ports (80 and 443).
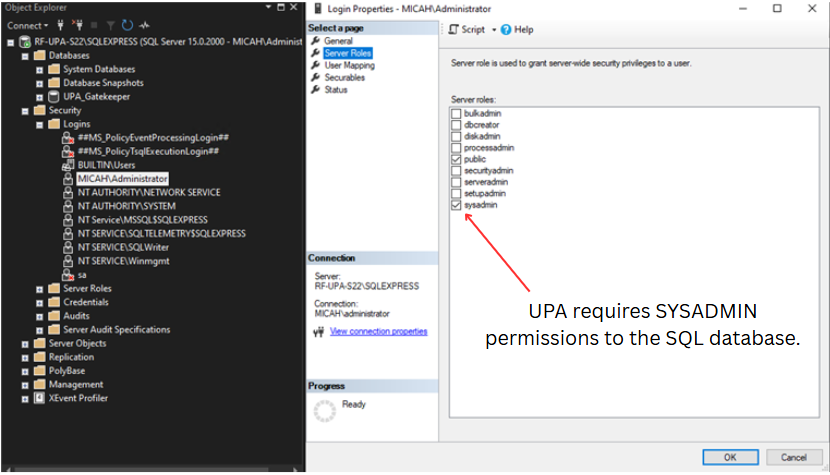
The website URL will be detected from the TLS certificate that you provide. This URL will become the location where your users access UPA. - Microsoft SQL Server 2016 or later. A SQL database will be established as your internal offline repository for managing GPOs and OUs. SYSADMIN permissions are needed during installation.
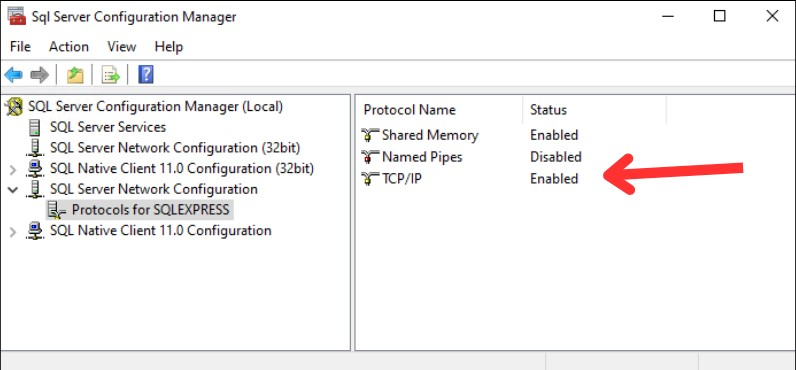
If your Microsoft SQL Server is remote, either TCP/IP or Named Pipes must be enabled, and the appropriate firewall port (typically TCP 1433 inbound for TCP/IP) must be open.
Please see video below which goes through the UPA installation.
Installation Steps
To install Universal Policy Administrator complete the following steps:
- Log in to the machine as a local administrator
- Right-mouse click on the UPA installer file to ‘Run as administrator’ and begin the installation.
- Read and accept the license agreement, and click Next.

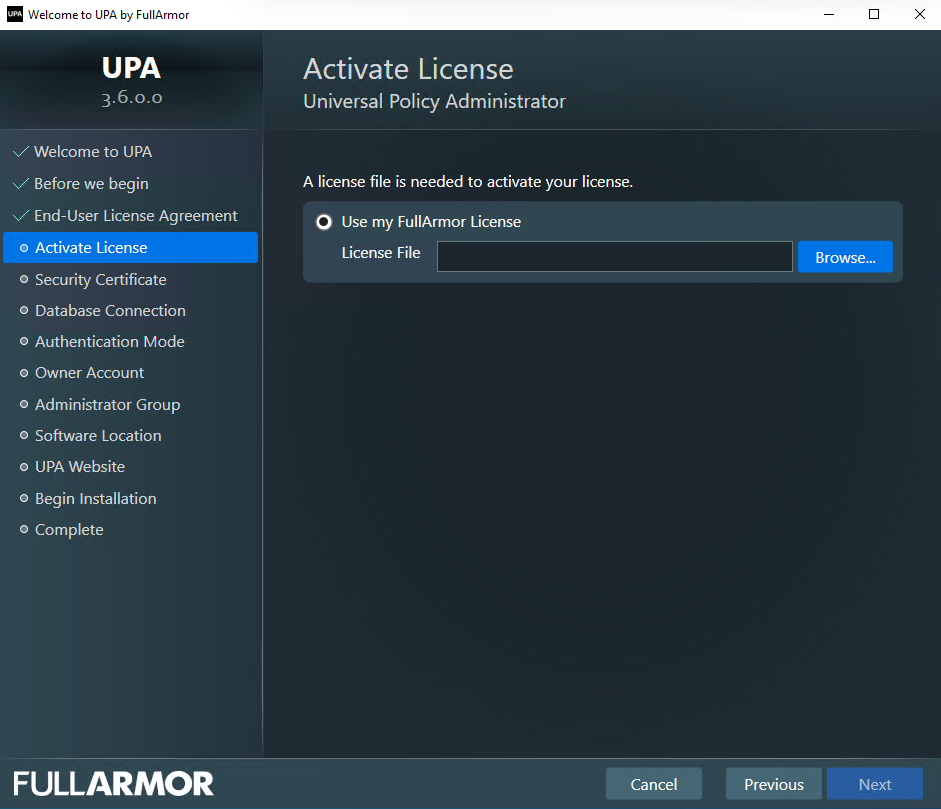
- Click Browse to select your Full Armor license file, and click Next. If you do not have a Full Armor license file, please see your Full Armor contact.
- Use a certificate issued by a valid certificate authority.
- You can create internal certificates in Windows Server by setting up a Microsoft Certificate Authority (CA) using Active Directory Certificate Services (AD CS).
- Alternatively, for evaluation purposes, you can use a temporary certificate that UPA will automatically generate for you.
Note: You may use a self signed certificate to evaluate; however it is not a secure solution in production.
- Select the SQL Connection Wizard button.
- The Edit SQL Connection String dialog box opens.
- In the Server Name box, enter a name or select from the list.
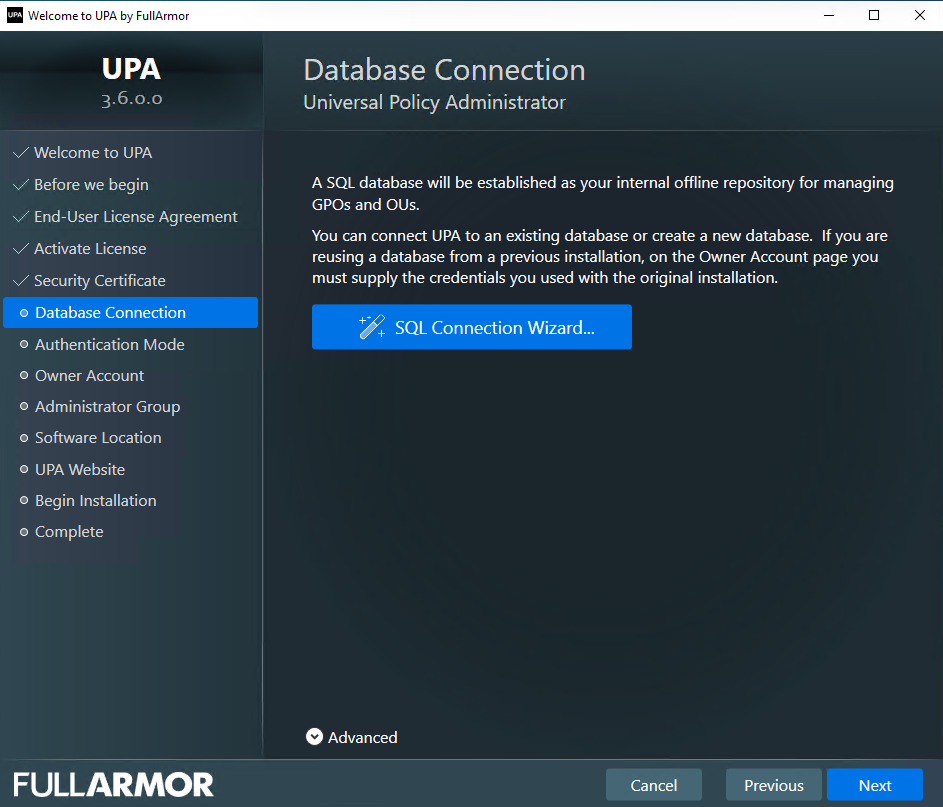

Note: We recommend a unique database name for each installation. To reuse a database from a previous installation, you must specify the owner account credentials originally used to create such database, to avoid an installation failure.
Note: If your Microsoft SQL Server is remote, either TCP/IP or Named Pipes must be enabled, and the appropriate firewall port (typically TCP 1433 inbound for TCP/IP) must be open.
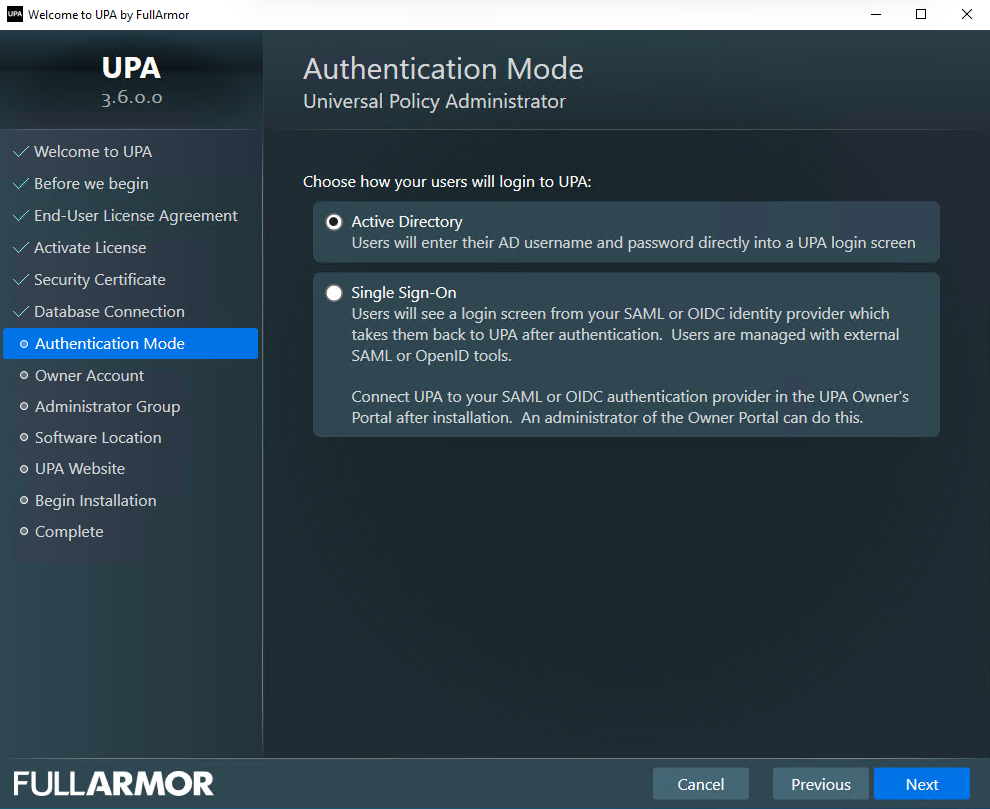
- Select an Authentication Mode to choose how your users will login to UPA. In the Authentication Mode, select Active Directory if you want you and your users to log into UPA with AD credentials.
Alternatively, if you want to login using Microsoft Entra ID or a third party identity provider, select Single Sign-on. You can then configure this in our Owner’s Portal (see next screen) at the end of the installation or at any time.
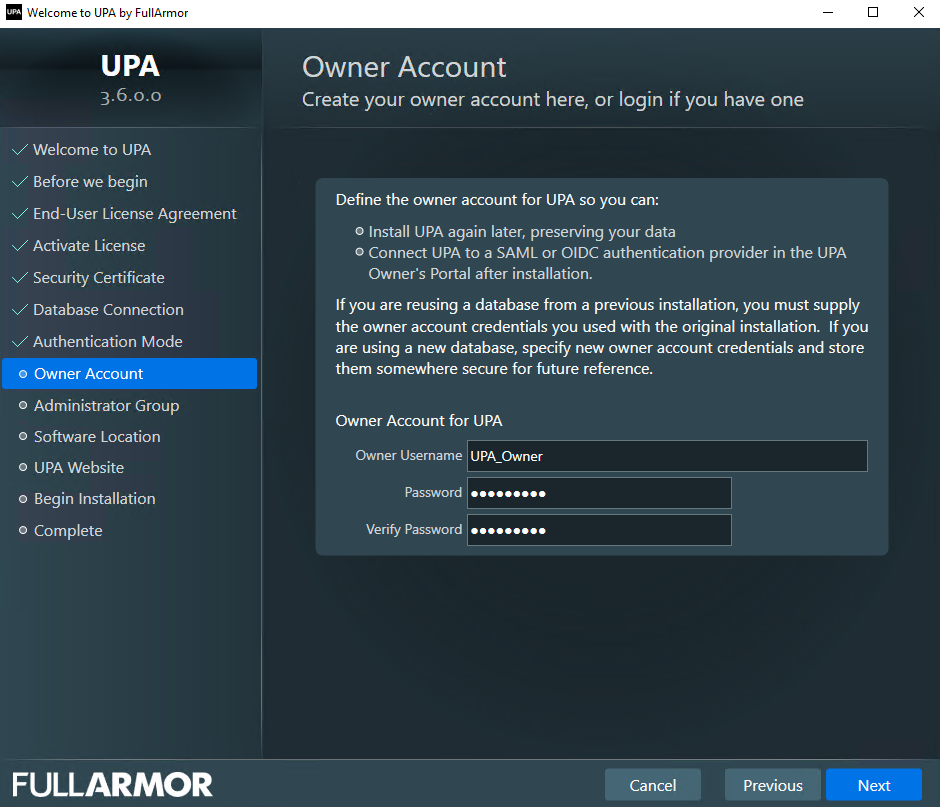
- Create your Owner Account username and password, and click Next. This allows you to preserve your UPA data and access the UPA Owner’s Portal for Microsoft Entra, SAML, or OIDC configuration.
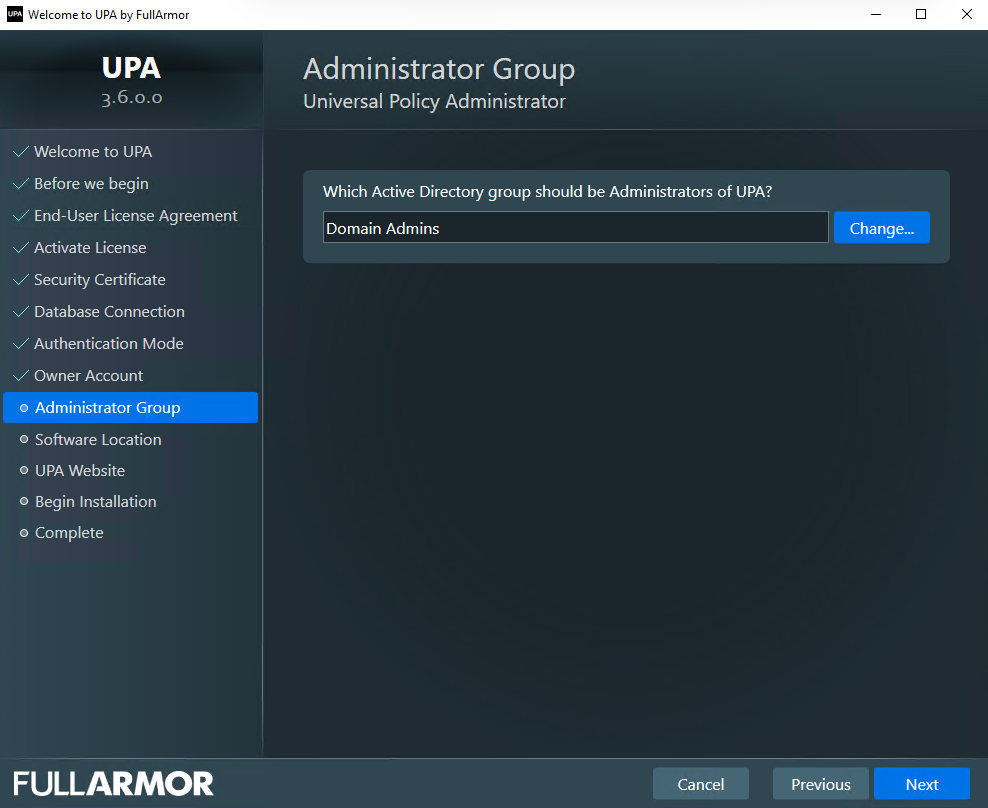
- (Optional) Change the default Administrator Group, and click Next.
Please see our Least Privilege Account (LPA) documentation to configure UPA for more restricted groups. You can also do more granular permissions after initial installation.
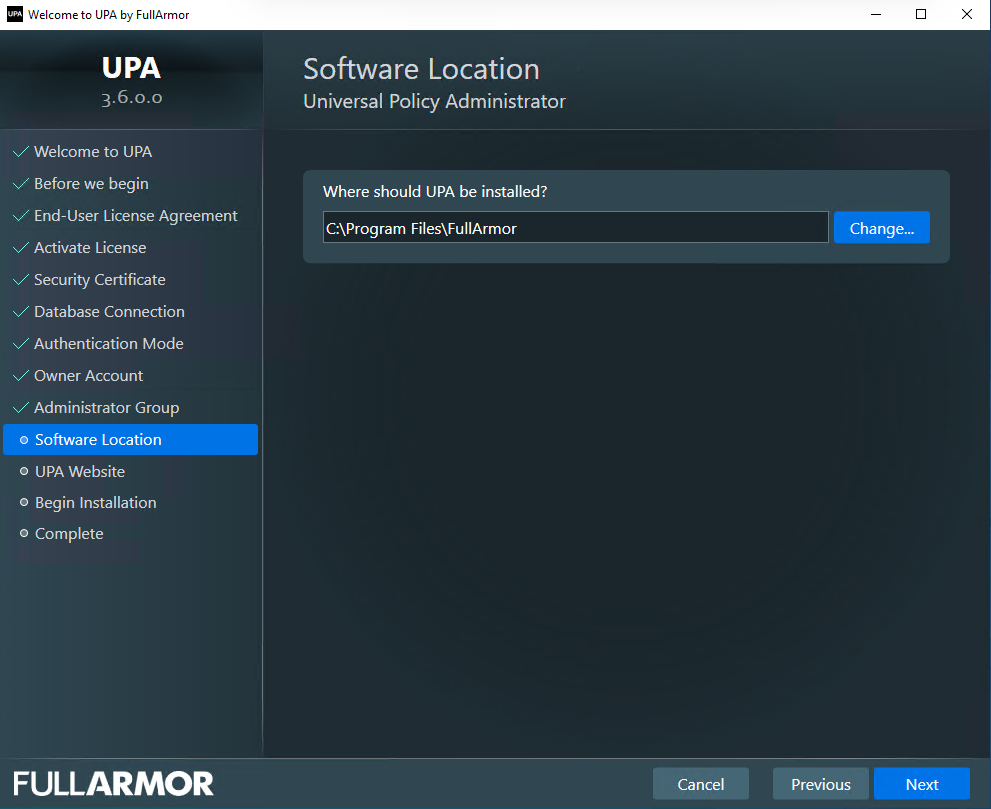
- (Optional) Change the default Software Location, and click Next.
- View your UPA Website, and click Next. This URL is based on your issued Security Certificate and proper DNS setup.
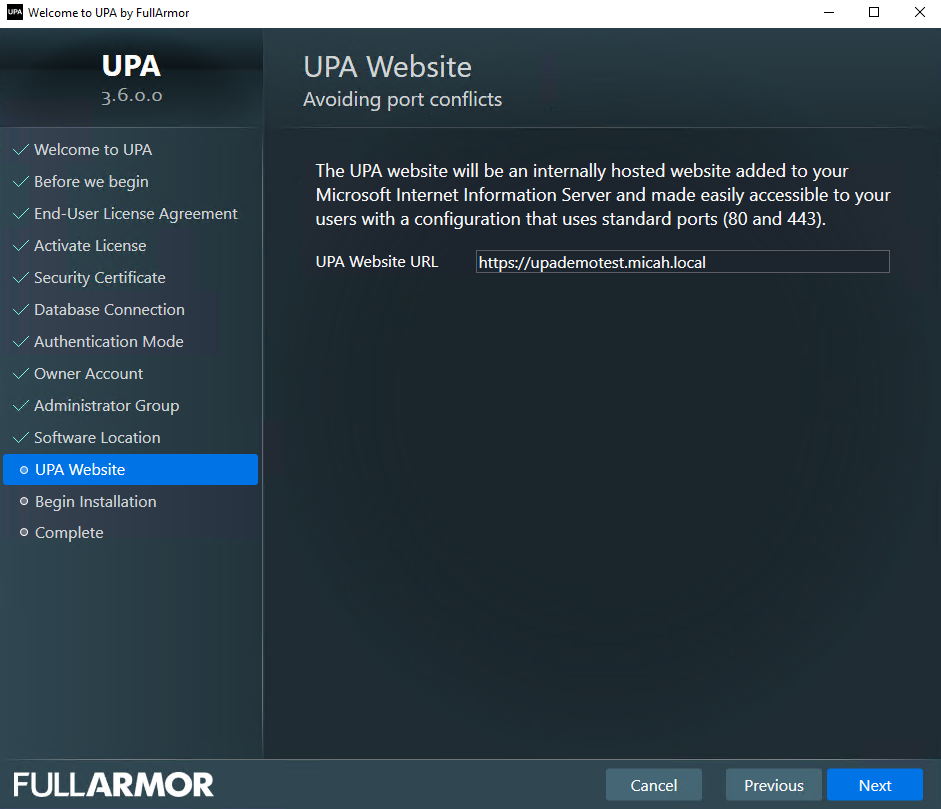
If you selected for UPA to generate a temporary certificate for evaluation purposes, then the UPA website URL will be your localhost plus the domain name.
- Review your choices to Begin Installation, and click Install.
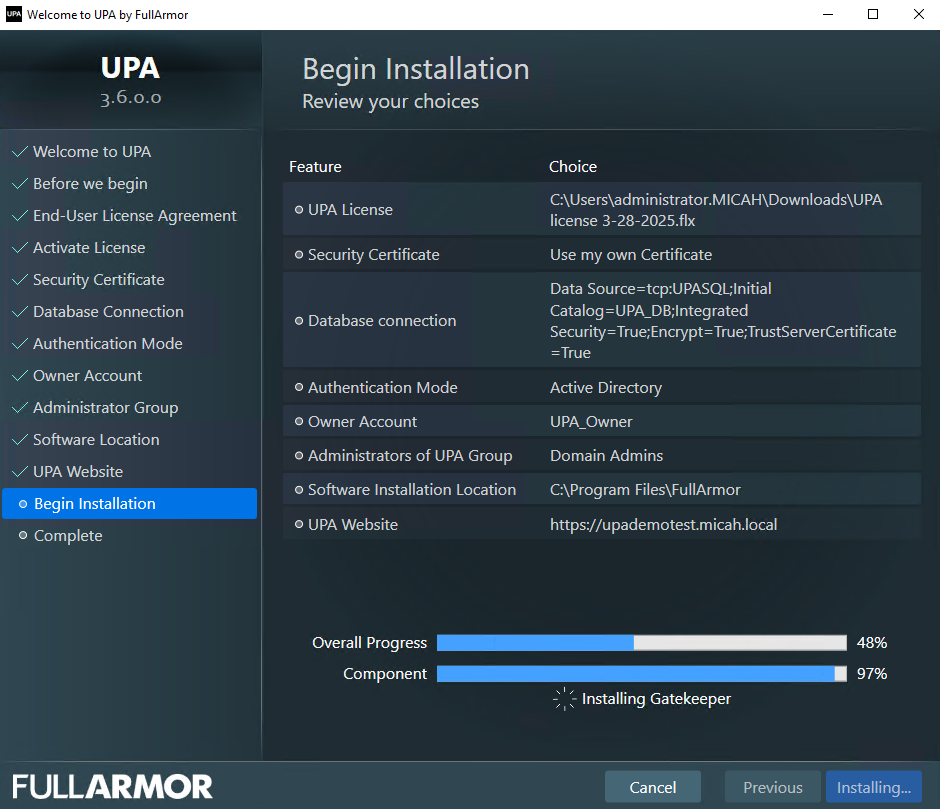
Note: If you are installing on Windows Server 2016 or 2019, you may be required to reboot if .NET is not already installed.
- Once the installation has completed, click the UPA Website link to open a browser and log into UPA.

- To log into UPA, enter the domain\username and password for the AD User Group that you selected during the installation (the default is Domain Admins group).

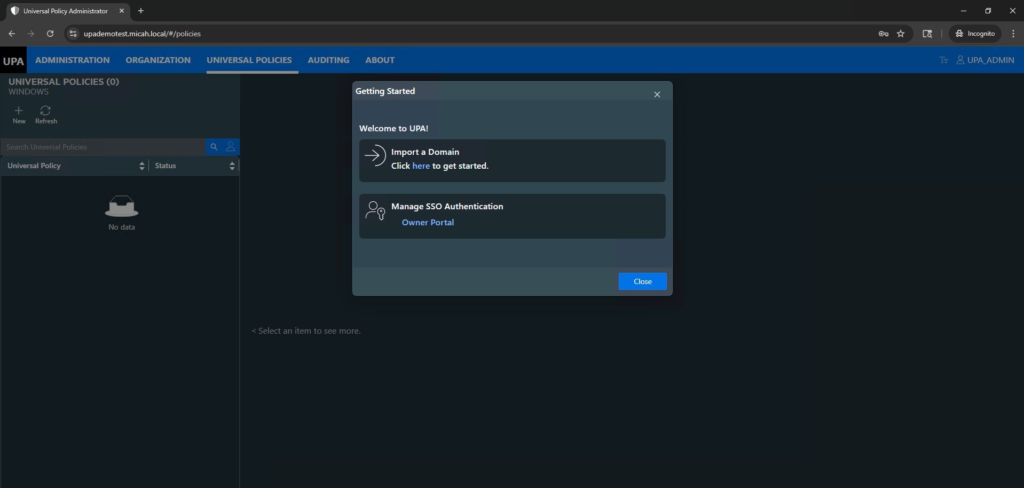
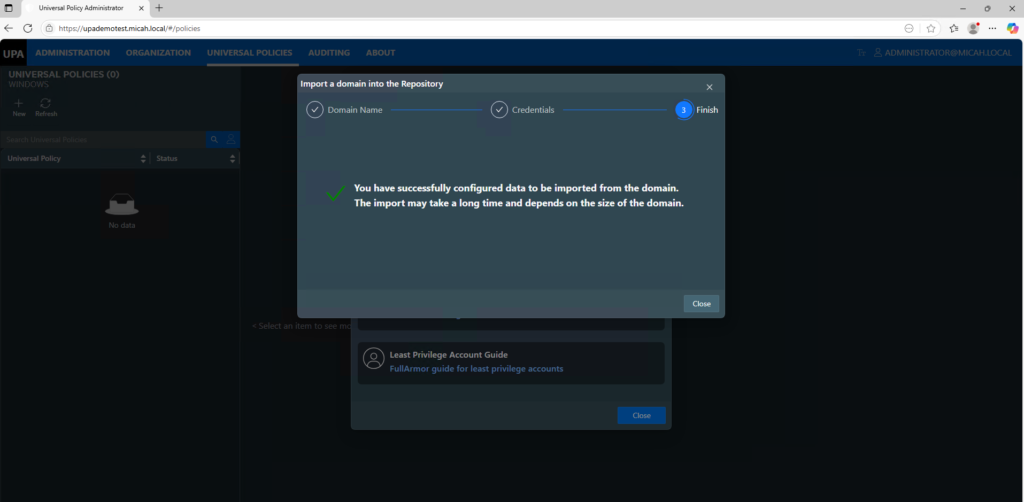
Import Domain
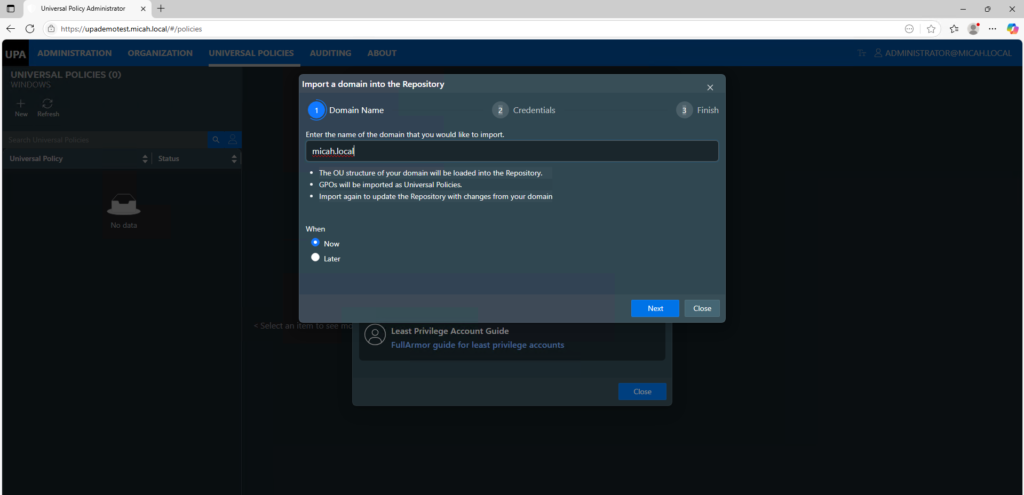
- Once you’ve successfully logged into UPA, you will see a splash screen to import a domain. Select Import a Domain, type the name of your domain, and enter your credentials.
- You can choose to import it immediately or schedule it for a future date and time.
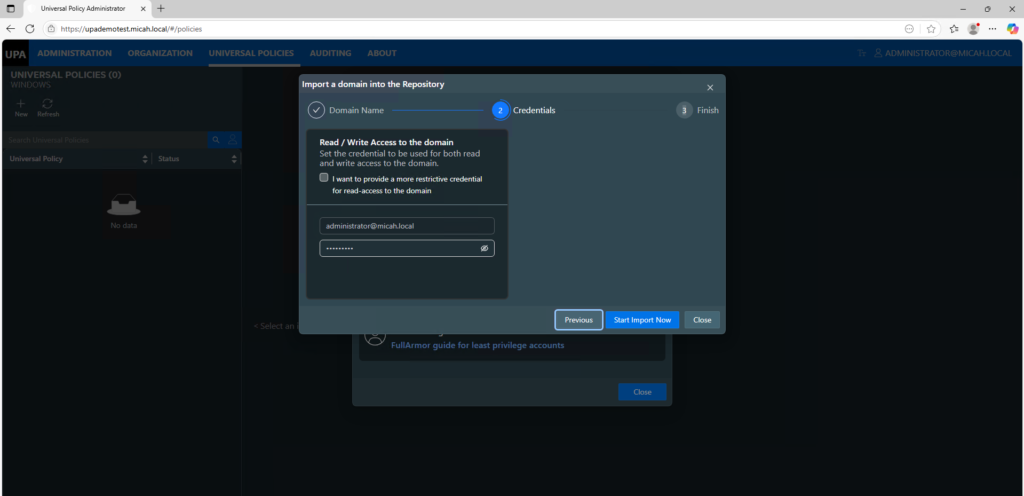
- Enter your credentials. Alternatively, if you are using Least Privilege Access, enter your Service account credentials.
- Depending on the size of your domain, including number of GPOs and OUs, this process may take a while.
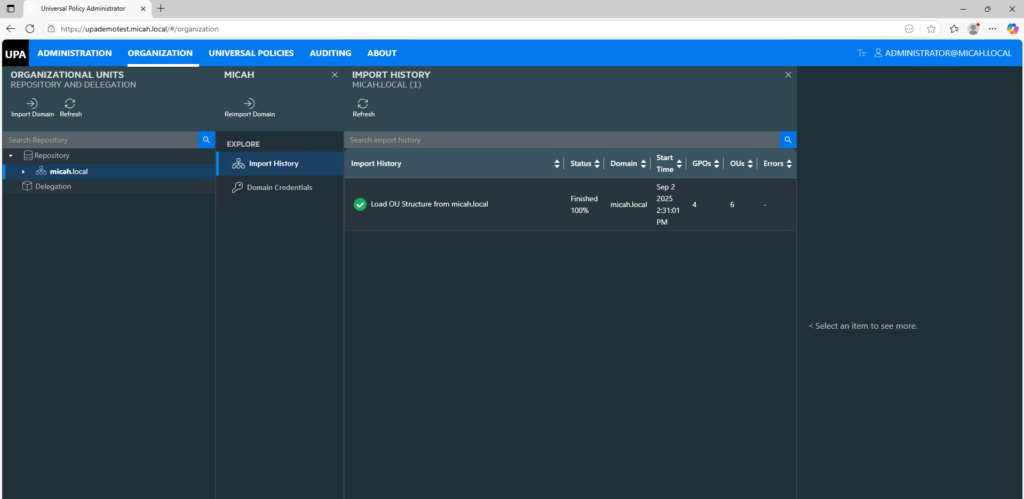
- You can see the status by going to the Organization tab and selecting on the domain / Import History as shown below.
Once you have successfully imported your domain(s), please proceed to the Working with Universal Policies section.