Universal Policy Administrator Documentation
Working with Citrix Policies
Universal Policy Administrator additionally provides offline change management of Citrix policies. It extends the Citrix Group Policy GPO snap-in to control virtual apps, desktops, and HDX features.
Please note: You must install the CitrixGroupPolicyManagement_x64.msi for UPA to work properly with the Citrix policies. If you do not already have it, please contact Full Armor to obtain the Citrix snap-in.
To create a Universal Policy with Citrix settings:
- Log in to the UPA Web Console and navigate to the Universal Policies tab.
- Click +New to open the New Universal Policy dialog box.
- On the Empty Universal Policy tab, enter a Name for the New Universal Policy.
- Enter a Domain name.
- (Optional) Browse the Delegation OU Tree.
- (Optional) Select the appropriate WMI Filter from the WMI Filter list.
- Click Create.
- Under the Windows Group Policy, select Policies.
- In the Policies section, select Administrative Templates.
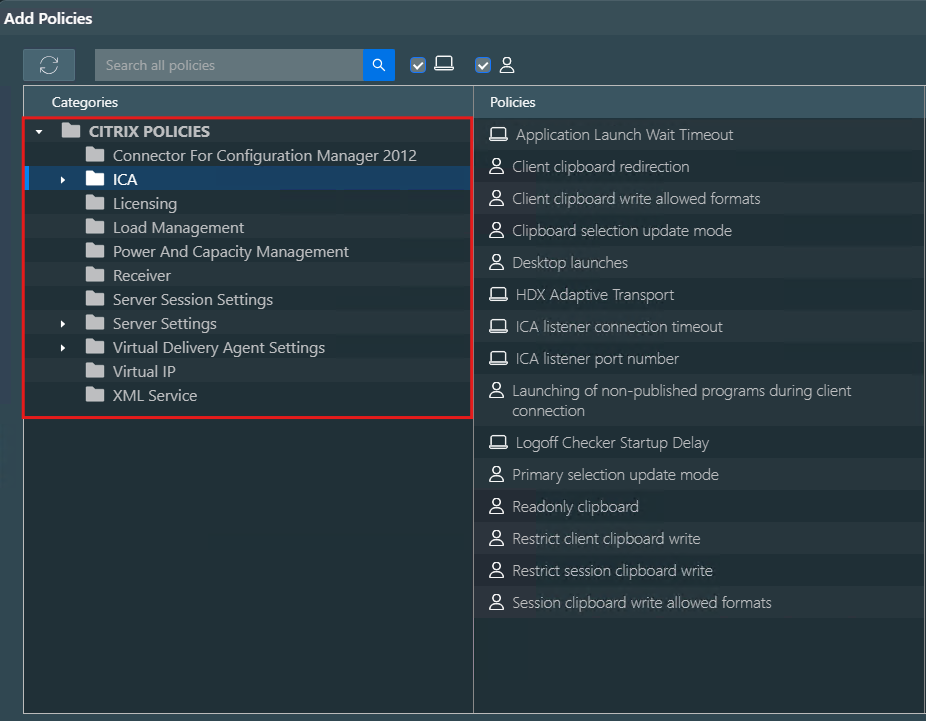
- In the Administrative Templates section, click +New to open the Add Policies window.
- Find the Citrix settings that you want to configure.
- Select Add Policy and Save.
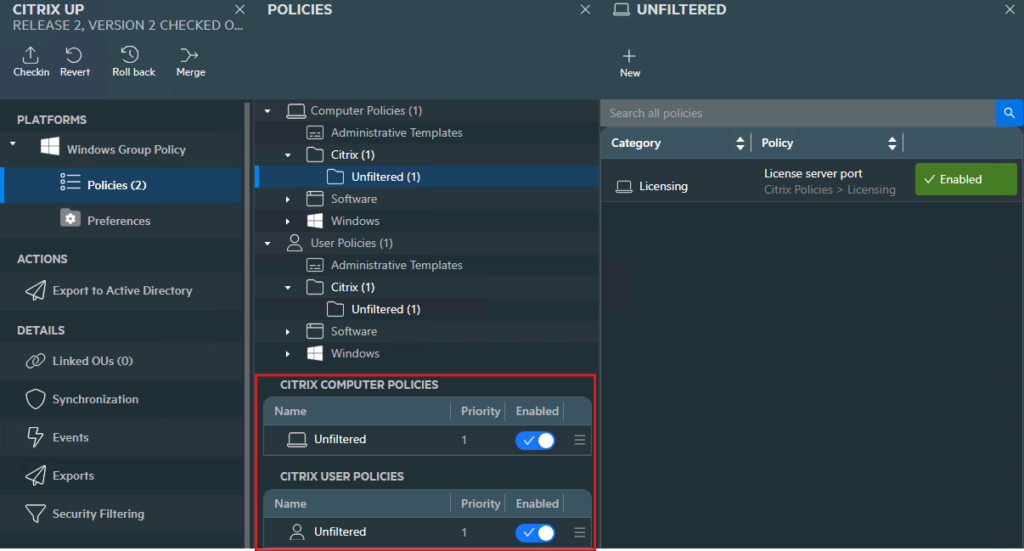
- At the bottom of the Policies section, select to Enable the Citrix Policies.
- Proceed through the UPA workflow to Checkin the policy, Approve, and Export it.
See the list of the Citrix settings in the Add Policies dialog box below.
After you select the desired Citrix policies, you will Enable them in the Policies section as shown below.