
Protecting Apache Web Server
Overview
Apache Web Server is used by the majority of web sites. As a result, hackers scan for it looking for a way to breach it. Here is a quick video showing Apache Web Server (http) over SSHepherd® with full access, but no open listening ports for incoming connections.
Configuring Apache Server and SSHepherd®
Below are the steps to secure your Apache Server using SSHepherd® so that you can close the open listening ports and only allow access to the site (or application running on Apache) to authorized users.
Pre-flight Checklist
- SSHepherd® Agent installed on your Apache Server
- SSHepherd® Control App/CLI installed on a client machine
- Your user account and the Apache Server Host are in the same SSHepherd® Group
- Verify you can ‘SSHepherd’ from your client machine to the Apache Server Host
Configure the Apache Server Host
- Configure the Apache Server to listen on localhost. In this example, we have ours listening on localhost port 80.
sudo nano /etc/apache2/ports.conf
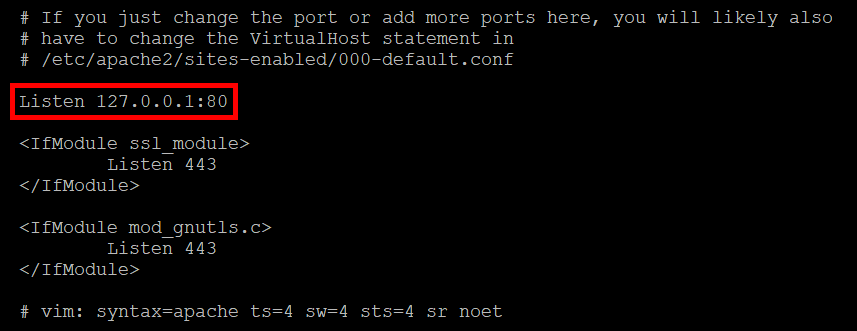
- Save and Exit the ports.conf file.
- Restart the Apache Server
sudo systemctl restart apache2
- Next we will configure the Agent to connect the web server over a SSHepherd® tunnel.
- Edit the agent.conf file to add a whitelist entry. This will whitelist the application and port to run through SSHepherd®.
sudo nano -w /etc/SSHepherd/agent.conf
- In your agent.conf file, add ,”whitelist”:[80], as shown in the example below.
{“id”: “123qwe456rty789asd”, “url”: “https://sshepherd.us”, “loglevel”:”ERROR”,”whitelist”:[80]}
- Save and Exit the agent.conf file.
- Restart the shepagent.service
systemctl restart shepagent
That’s all the configuration needed on the Apache Server Host to access the web server via the SSHepherd® Control.
Configure the App Tunnel in the SShepherd® Control App
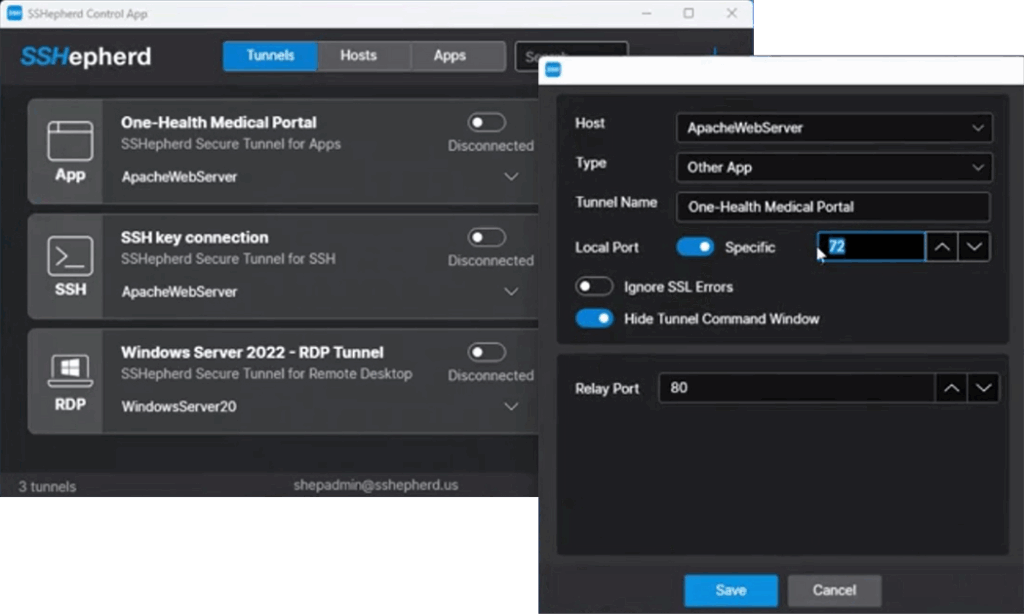
- Select a Host. This field contains a list of all Hosts you have been granted access to. Select your Apache Server Host from the list
- Select the Type. This field is the connection type for the session. Choose Other App from the list.
- Tunnel Name. This field allows you to give the tunnel a descriptive name.
- Local Port. By default, this option is set to ‘Automatic’ and will select a random port for you. In this example, we have set a specific port – 72.
- Ignore SSL Errors. By default, this option will not ignore SSL Errors. This option should only be used in evaluation and test environments, not for production environments.
- Hide Tunnel Command Window. By default, this option will hide the tunnel command window.
- Relay Port. This is the port number that was set in the Apache Server Config and whitelisted in the SSHepherd® Agent Config. Make sure you enter that same port number.
- Click ‘Save’.
Access the Apache Web Server via SSHepherd®
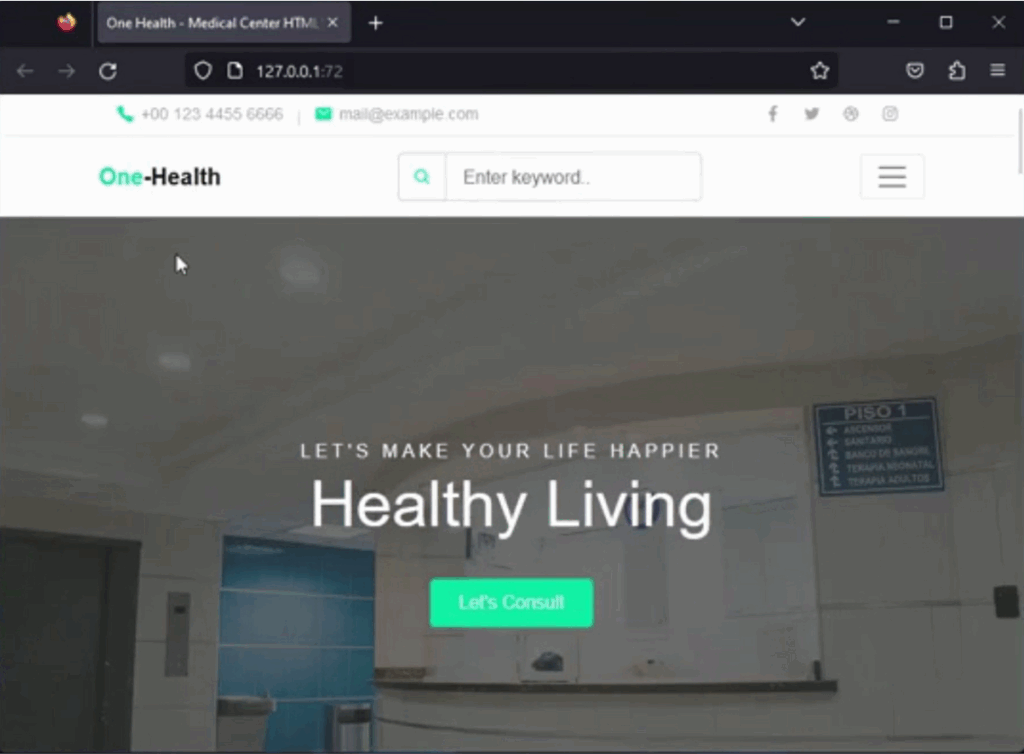
- Click the toggle switch to connect the tunnel we just created
- Open the Web Browser of your choice and enter 127.0.0.1:<port from Step 4> in the address bar.
- You should now see the web server index page load. When you close the SSHepherd® tunnel, and reload the browser, you will see that the remote Apache Server is no longer accessible until you initiate another session.
Because of the way SSHepherd® was architected, this can be done with almost any application that can be configured to listen on a specific port.