
Protecting an SFTP Server
Applies to SSHepherd 2.0
Overview
Many organizations use the SSH File Transfer Protocol (SFTP) to move and manage files. These steps protect an SFTP server with SSHepherd®, so you can close its listening port to the network and allow only authorized users.
Before you start
- The SSHepherd® Agent is installed on the SFTP server.
- The Control App or shepctl is installed on the user’s computer.
- The user and the SFTP server are in the same SSHepherd® group, or the user has a Generic tunnel definition for it.
Configure the agent for SFTP
Allow the SFTP port on the agent. SFTP normally uses port 22.
- In the Administrator Console, click Agents and select the SFTP server.
- Click the Settings tab.
- Add
22to Allowed Ports. - Click Save.
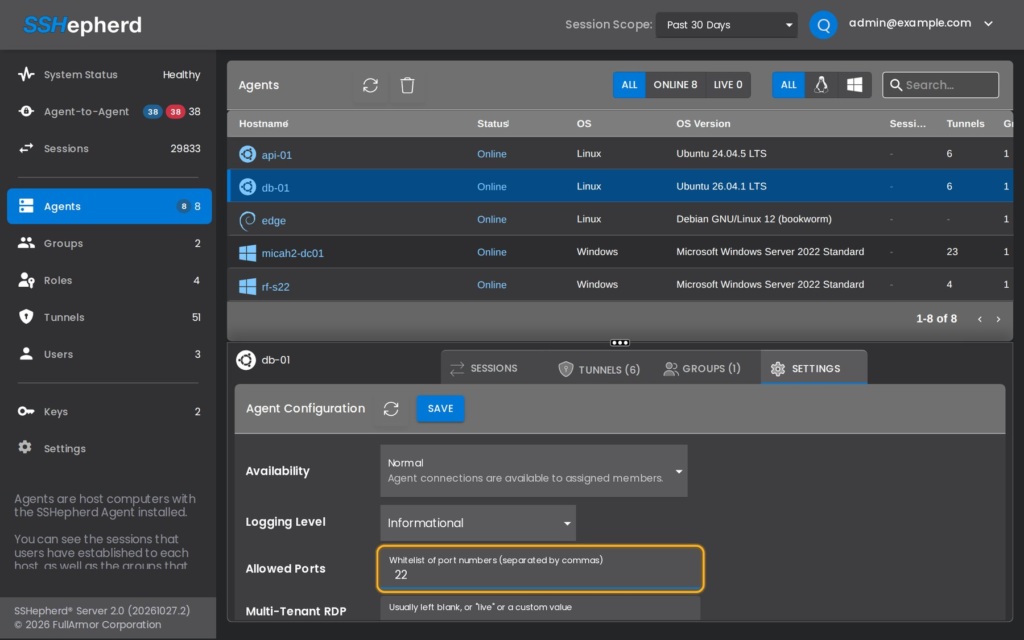
The agent applies the change within seconds; you don’t need to restart it.
In SSHepherd 1.x, you ran shepagent --port 22 add-whitelist on the host. That command doesn’t exist in 2.0.
Create a tunnel with shepctl
On your computer, sign in with shepctl, then run:
shepctl --hostname <sftp server host name> --relayport 22 tunnelshepctl opens a tunnel on localhost with a random port, and prints the port.
To choose the local port yourself, add --port:
shepctl --hostname <sftp server host name> --relayport 22 --port 9999 tunnelCreate a tunnel with the Control App
- Ask your administrator for a Generic tunnel definition with To Agent set to the SFTP server, Remote Host
127.0.0.1, Remote Port22, and a Specific local port such as 9999. See Tunnel Definitions. - In the Control App, switch the tunnel on.
Connect your SFTP client
With the tunnel open, connect your SFTP client to 127.0.0.1 on the tunnel’s local port. For example, with the OpenSSH sftp client and local port 9999:
sftp -P 9999 <user>@127.0.0.1Note the capital -P, which sets the port for sftp.
Tip: For SSH and SCP to the same server, you can also use
shepctl ssh-tunnelandshepctl scp-tunnel, which don’t need port 22 in Allowed Ports. See Creating an SSH Session.