
Tunnel Definitions
Applies to SSHepherd 2.0
Overview
A tunnel definition is a saved tunnel that you set up once and give to users or groups. The users then open it by name from the Control App, or by ID with shepctl, without typing host IDs or ports. This is new in SSHepherd 2.0.
You manage tunnel definitions on the Tunnels page of the Administrator Console. There are four types:
| Type | What it does |
|---|---|
| SSH | Opens an SSH session to the agent. |
| RDP | Opens a Remote Desktop session to a Windows agent. The remote port defaults to 3389. |
| Generic | Forwards a TCP port through the agent, to a service on the agent itself or on another machine the agent can reach. Use it for web servers, databases and other TCP/IP applications. |
| Agents (Agent-to-Agent) | Connects one or more source agents to a service through a destination agent, with no user involved. See Agent-to-Agent (A2A) Tunnels. |
Users can still open tunnels without a definition, using shepctl or the Control App. See Creating an SSH Session, Creating an RDP Session and Creating a Generic (TCP/IP) Application Session.
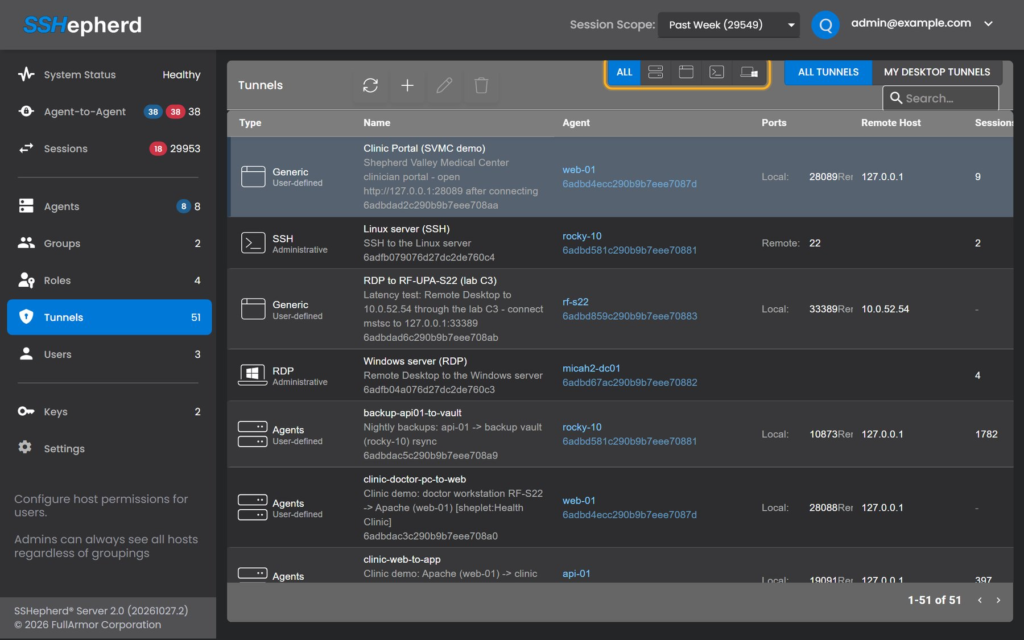
Who can use a definition
When you create a definition, you assign it to one or more users, or to a group:
- A definition assigned to a user is available to that user.
- A definition assigned to a group is available to every member of the group. Members can open it even if the group doesn’t contain the agent itself. Adding or removing a member changes who can open it immediately.
- Users with the create-admin-tunnel permission, such as administrators, can open any user’s definition, but only by its ID. See “Open another user’s definition” below.
Note: The Control App and
shepctl list-tunnelshow only the definitions you created and the definitions assigned to you, whatever your role. This includes administrators, and users with the list-all-tunnel-definitions permission. To see every definition, use the Tunnels page in the Administrator Console.
Users who aren’t assigned to a definition are refused with “Tunnel error: Unauthorized”.
Permissions
To create and manage definitions in the console, you need a role with the tunnel definition permissions, such as the built-in admin role. The built-in user role can create personal tunnels in the Control App but not on the Tunnels page. See Managing Roles.
Create a tunnel definition
Common fields
Every type has these fields:
| Field | Description |
|---|---|
| To Agent | The agent the tunnel goes through. |
| From Users | The users who can open the tunnel. To assign a group instead, choose Select Group… and pick the group. |
| Tunnel Name | The name users see in the Control App and in shepctl list-tunnel. Use a unique name. |
| Description | Optional text that helps users choose the right tunnel. |
| Local Port | The port the tunnel listens on, on the user’s computer. Automatic picks a free port each time the tunnel opens. Specific always uses the port you enter. Use Specific when an application or script needs a fixed port. |
Ports must be between 1 and 65535.
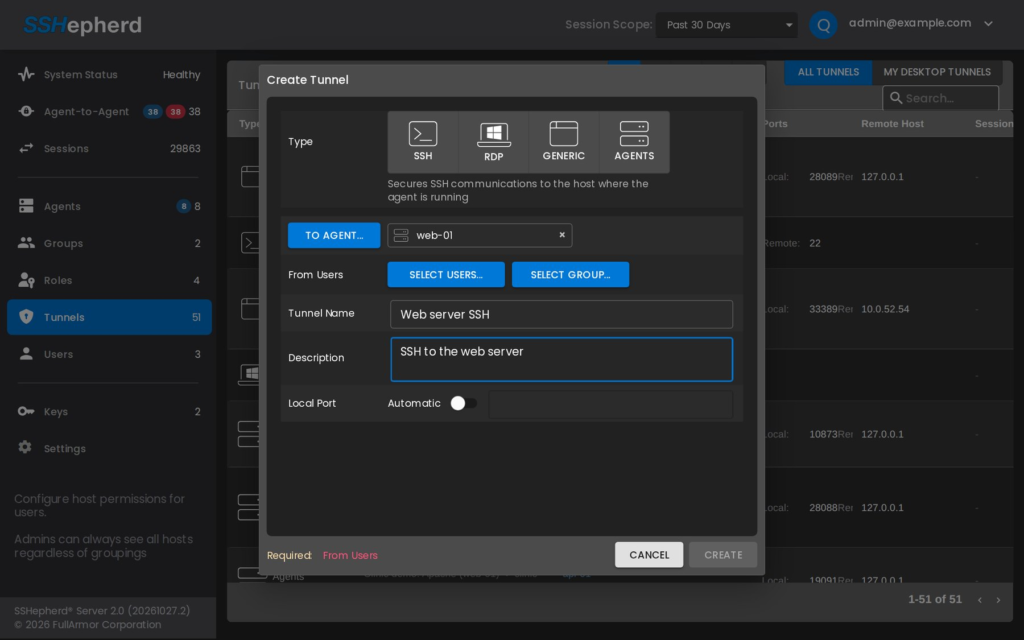
Create an SSH definition
- In the Administrator Console, click Tunnels.
- Click +. The Create Tunnel dialog opens with SSH already selected.
- Choose the agent in To Agent.
- Choose the users, or a group, in From Users.
- Enter a Tunnel Name and, optionally, a Description.
- Optionally, enter the SSH User to sign in as, and any SSH Args to pass to the ssh client.
- Click Create.
Tip: The type tiles at the top of the dialog switch on and off. If you click SSH while it’s already selected, it’s deselected and Create stays unavailable. Click SSH again to select it.
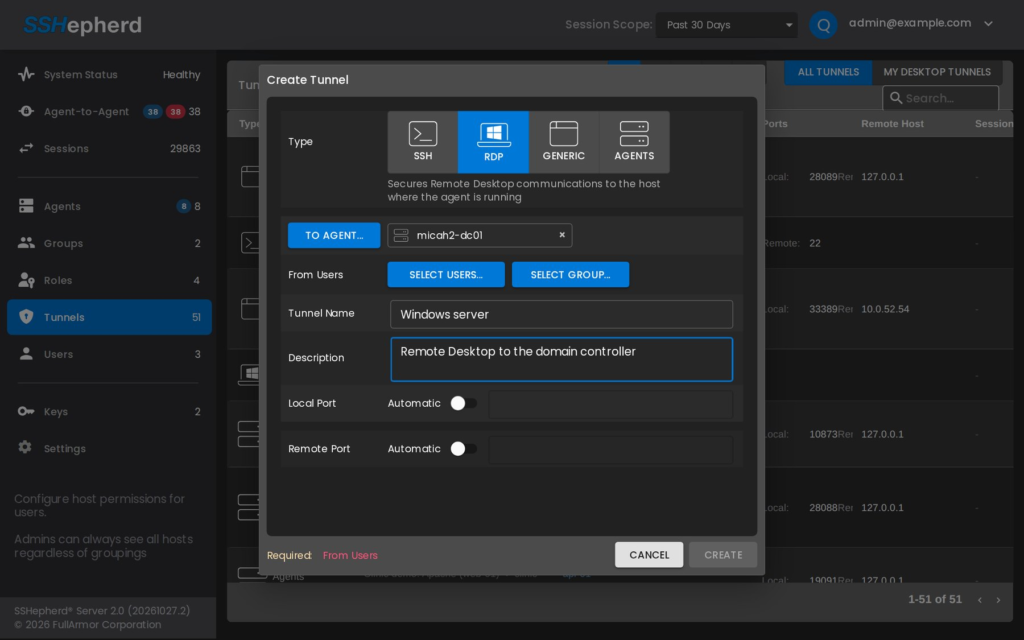
Create an RDP definition
- On the Tunnels page, click +, then click RDP.
- Choose a Windows agent in To Agent.
- Choose the users or group in From Users.
- Enter a Tunnel Name and, optionally, a Description.
- Click Create.
RDP definitions connect to Remote Desktop on port 3389 on the agent.
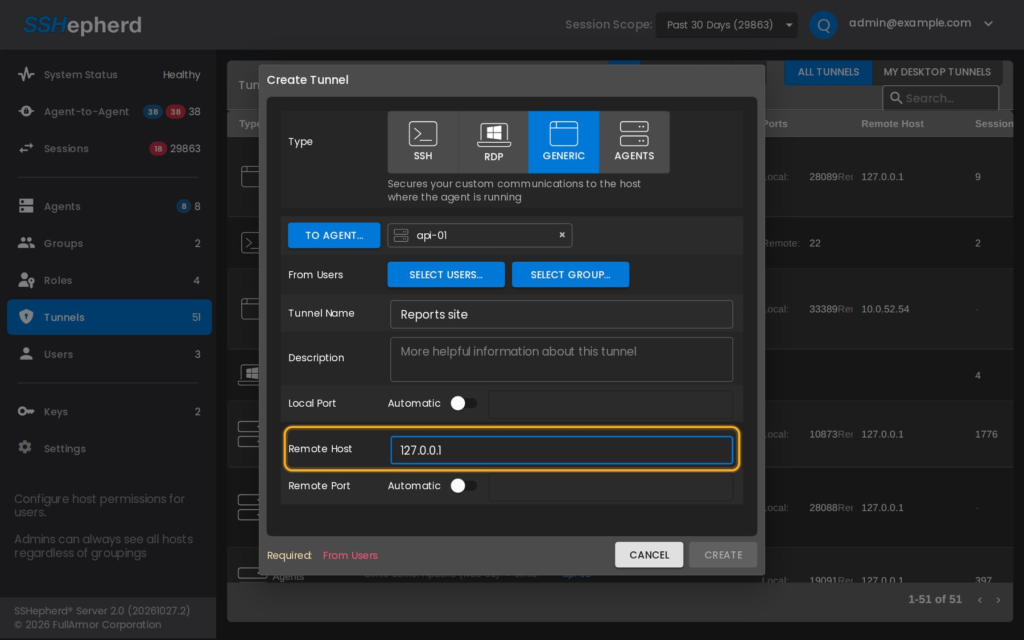
Create a Generic definition
- On the Tunnels page, click +, then click Generic.
- Choose the agent the traffic goes through in To Agent.
- Choose the users or group in From Users.
- Enter a Tunnel Name and, optionally, a Description.
- In Remote Host, enter where the service runs:
127.0.0.1for a service on the agent itself.- The IP address or host name of another machine that the agent can reach.
- In Remote Port, enter the service’s port, for example 8080 for a web application.
- Set Local Port to Automatic or Specific.
- Click Create.
Important: Always fill in Remote Host and Remote Port. The dialog lets you create a Generic definition without them, but the tunnel can’t connect.
Note: To give users a Generic tunnel, create it on the Tunnels page. In 2.0, a Generic tunnel created in the Control App doesn’t save its remote host and port, so it can’t connect.
Create an Agent-to-Agent definition
Click Agents in the Create Tunnel dialog. A2A tunnels have their own fields and behavior. See Agent-to-Agent (A2A) Tunnels.
Open a tunnel definition
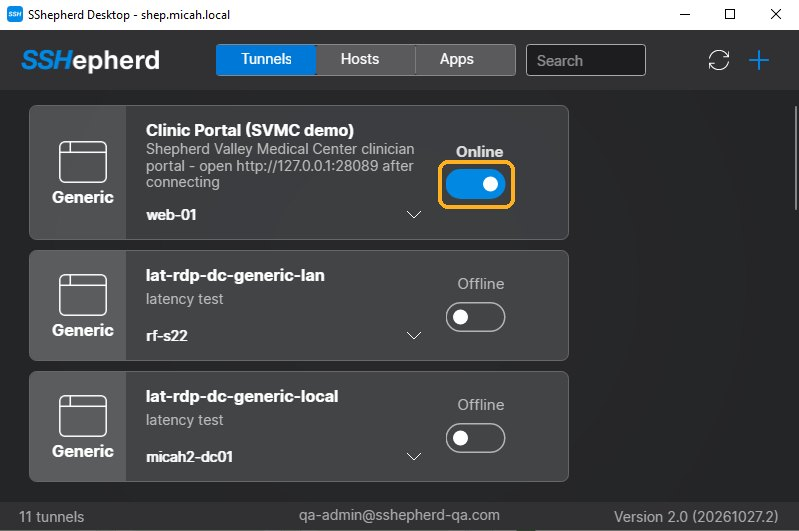
From the Control App
- Sign in to the Control App.
- The tunnels you created or that are assigned to you are listed. Switch on the tunnel you want.
- The Control App opens the tunnel in its own shepctl console window. For RDP and SSH, it also starts your Remote Desktop or ssh client. For Generic tunnels, the console window shows the local port, for example
tunnel open on localhost: 18600; connect your application to127.0.0.1on that port. - To close the tunnel, switch it off and click Yes to confirm.
From shepctl
- List the definitions you created or that are assigned to you, with their IDs:
shepctl list-tunnel - Open a definition by its ID:
shepctl --tunnelid <tunnel id> tunnel- For an RDP definition, shepctl opens the tunnel and starts your Remote Desktop client.
- For an SSH definition, shepctl opens the tunnel and starts your ssh client.
- For a Generic definition, shepctl prints the local port, for example
tunnel open on localhost: 18600. Point your application at127.0.0.1on that port.
- Press Ctrl+C to close the tunnel.
shepctl list-tunnel shows SSH, RDP and Generic definitions. Agent-to-Agent tunnels don’t need to be opened by a user, so they aren’t listed.
Tip: The local port comes from the definition. If the definition’s Local Port is Automatic, the port changes each time. If you need the same port every time, ask your administrator to set a Specific local port.
Note: If a Generic tunnel opens but every connection closes straight away, the agent is refusing the traffic. shepctl still reports the tunnel as open. Check the definition’s Remote Port, and check the agent’s log. See Troubleshooting.
Open another user’s definition
Users with the create-admin-tunnel permission can open any user’s tunnel definition with shepctl, even though it isn’t listed for them:
- In the Administrator Console, click Tunnels and find the definition.
- Copy its tunnel ID, shown under the definition’s name. When you select the definition, the panel below also shows the full command under Usage.
- Open it:
shepctl --tunnelid <tunnel id> tunnel
Find definitions
On the Tunnels page you can:
- Filter by type: Agent, Generic, SSH or RDP.
- Click My Desktop Tunnels to see the tunnels you created in the Control App.
- Search by name.
A group’s definitions are also listed on its Tunnels tab on the Groups page, and a user’s on the Tunnels tab of their entry on the Users page.
Edit a tunnel definition
- On the Tunnels page, select the definition.
- Click the edit (pencil) icon.
- Make your changes and click Save.
Important: In 2.0, the edit dialog doesn’t load a Generic definition’s Remote Port, so saving an edit clears it and the tunnel stops working. Until this is fixed, don’t edit Generic definitions. Delete the definition and create it again with the new settings. After any edit, run
shepctl list-tunnelto check that the definition still shows its remote port.
Delete a tunnel definition
- On the Tunnels page, select the definition.
- Click the delete (trash) icon.
- Confirm.
Users can no longer open the definition. Opening it by ID returns “Tunnel not found”.
Deleting a definition also closes tunnels that users already have open from it.
Definitions are also deleted when you:
- Delete the group they’re assigned to. See Creating Users and Groups.
- Remove the agent they point to. See Managing Agents.